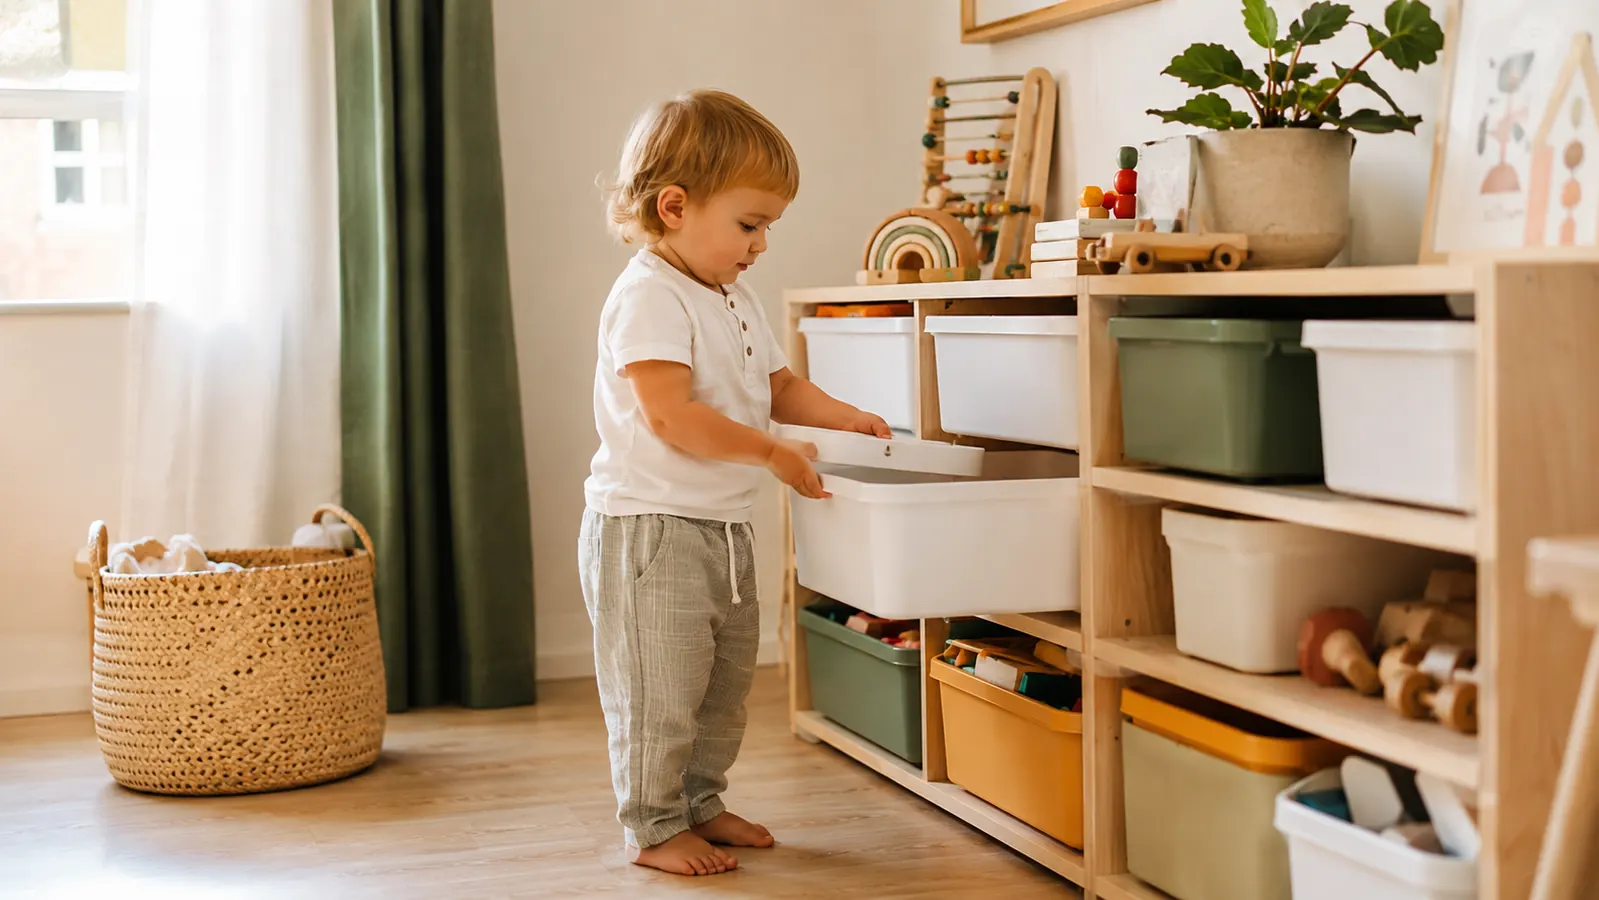
Every parent I work with says the same thing within the first five minutes of a consultation: the toys come out fine, it's the putting away that never happens. They have tried bins, baskets, cubbies, toy chests. The toys still end up on the floor by 4pm. In fifteen years of professional home organizing, I have set up toy storage systems in dozens of family rooms, playrooms, and small shared living spaces, and I can tell you that the problem is almost never the kids. It is the system. Specifically, the toy storage organizer is usually too hard for small hands to navigate, the categories are not visible enough, or the whole unit is aimed at adult aesthetics rather than child independence.
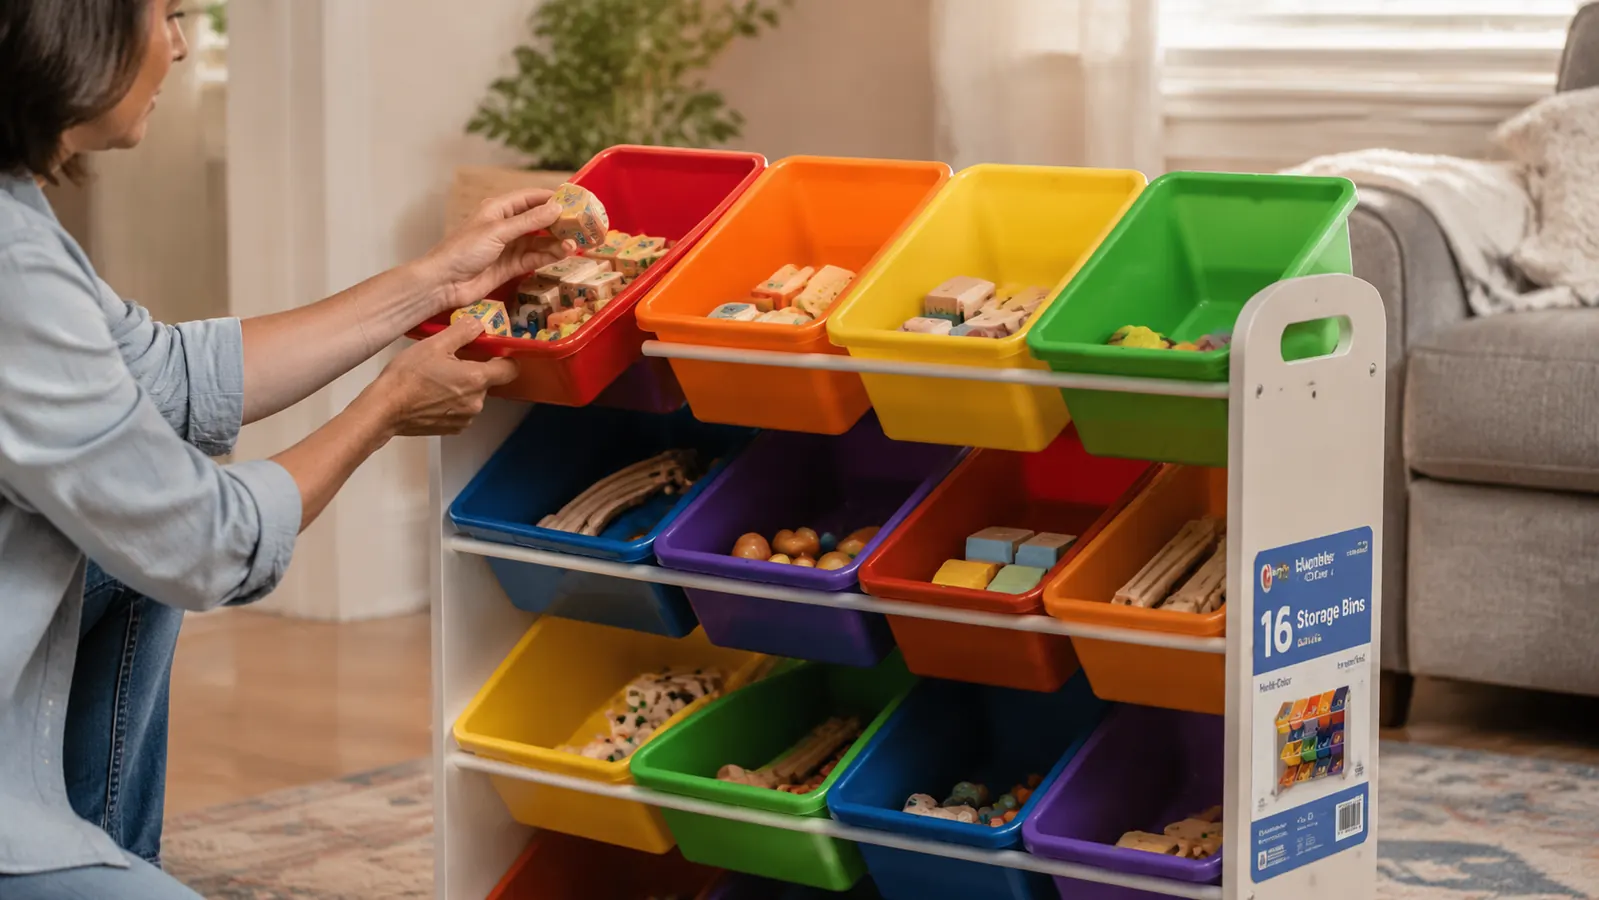
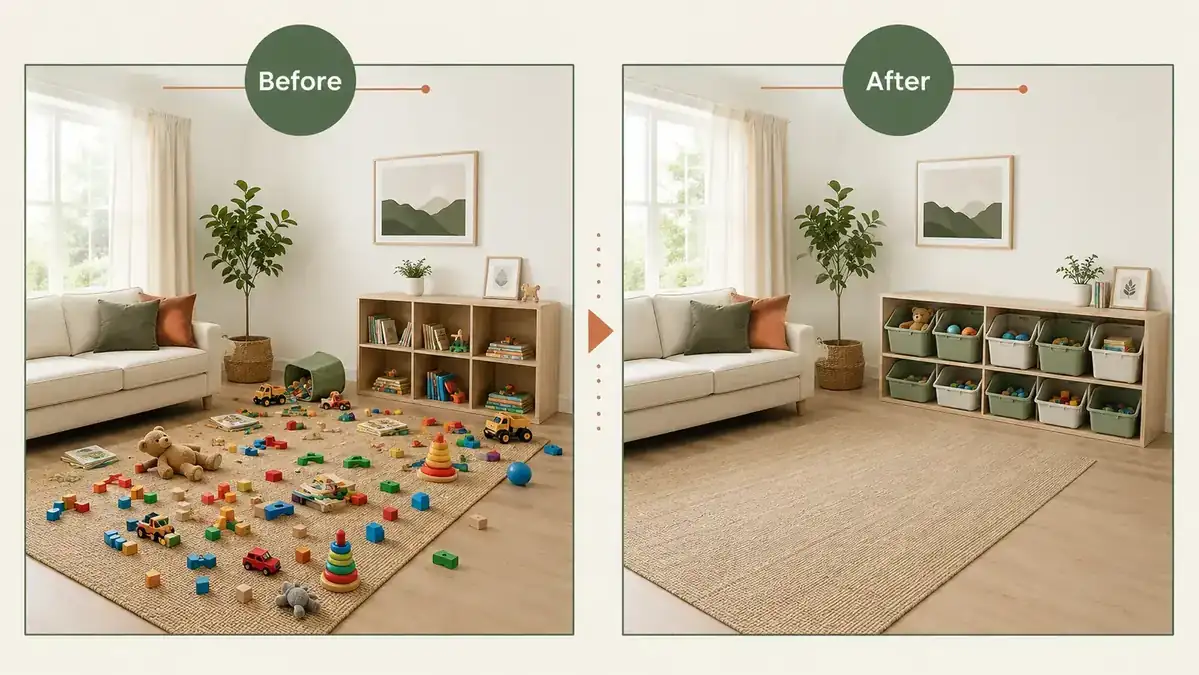
The Humble Crew toy organizer with 16 removable storage bins is the anchor piece I use in almost every playroom setup I do now. It sits low enough that kids ages two through eight can reach every bin without help. The bins pull out fully, which matters more than most parents realize. And the structure itself is stable enough that a determined toddler can hang off it without it tipping. But the organizer is only the starting point. How you set it up, categorize the bins, and label them for a child's eye, those are the decisions that determine whether the toy storage system actually gets used. Here is the exact process I follow.
If the toys own your floor, the bin organizer is probably the first fix
The Humble Crew 16-bin toy organizer is the unit Dana sets up in most client playrooms. Low enough for toddlers, stable enough for daily rough use, and available with multiple bin color combinations.
Amazon Check Today's Price on Amazon →Step 1: Pull Every Toy Out and Sort by What Kids Actually Reach For
Before any bin touches any shelf, I empty the whole room. I mean everything. Pile it in the center of the floor or in a hallway. This is the step parents resist the most because the mess looks catastrophic before it looks better, but it is non-negotiable. You cannot build a category system around a pile you have never actually looked at. You need to see the whole inventory at once.
As you sort, watch which toys the kids actually go for when you are not directing them. I usually do this step with a parent while the kids are present, just playing freely in the cleared space. What comes out of the pile first tells you which categories will get the heaviest use. Blocks and building toys almost always top the list. Small vehicles tend to come in second. Art supplies, puzzles, stuffed animals, and dress-up accessories round out the top five in most homes. Toys the child has not touched in four months go into a donation box immediately. Do not ask. Do not negotiate. If they have not reached for it, it is taking up bin space that could hold something they love.
The goal of this step is not a perfect sort. It is a rough grouping of eight to twelve toy categories that you can then map to bins. With a 16-bin organizer you actually have room to keep the categories generous, which means less precise sorting is required from the child during cleanup. Broad categories like 'blocks' and 'cars' beat narrow ones like 'foam blocks' and 'wooden cars' every single time because a child can aim for a wider target and still succeed.
Step 2: Match Categories to Bin Sizes Before You Assemble Anything
The Humble Crew unit has a mix of larger bins on the lower rows and smaller bins near the top. This is not cosmetic. It is functional, and you need to use it intentionally. Larger bins hold the bulkier, highest-frequency toys: blocks, large vehicles, balls, stacking rings. Smaller bins work for things with more pieces but less volume: crayons and markers, small figurines, puzzle pieces stored in a zip bag, Lego minifigures. Put your highest-frequency categories in the bins that sit between the child's knee and shoulder height. That sweet spot is where a young child will reach first, and it is where the bins need to go back without too much effort.
I also recommend leaving two bins empty or lightly stocked at first. This gives you overflow room for the inevitable category that gets bigger than you planned, and it gives children a mental buffer. When every bin is packed to the brim, putting a toy away requires wrestling something back in. That friction is enough to make a three-year-old give up. A little breathing room per bin makes the return trip much easier.
Also think about weight. The lower bins on the unit will hold heavier loads, so put your densest toys there. Heavy bins on high shelves mean a child has to work hard to lift them back up, which discourages independent cleanup fast. Keep the heavy stuff low, the light stuff high. It sounds obvious once you say it out loud, but I see it done backward in almost every home I walk into before the setup.
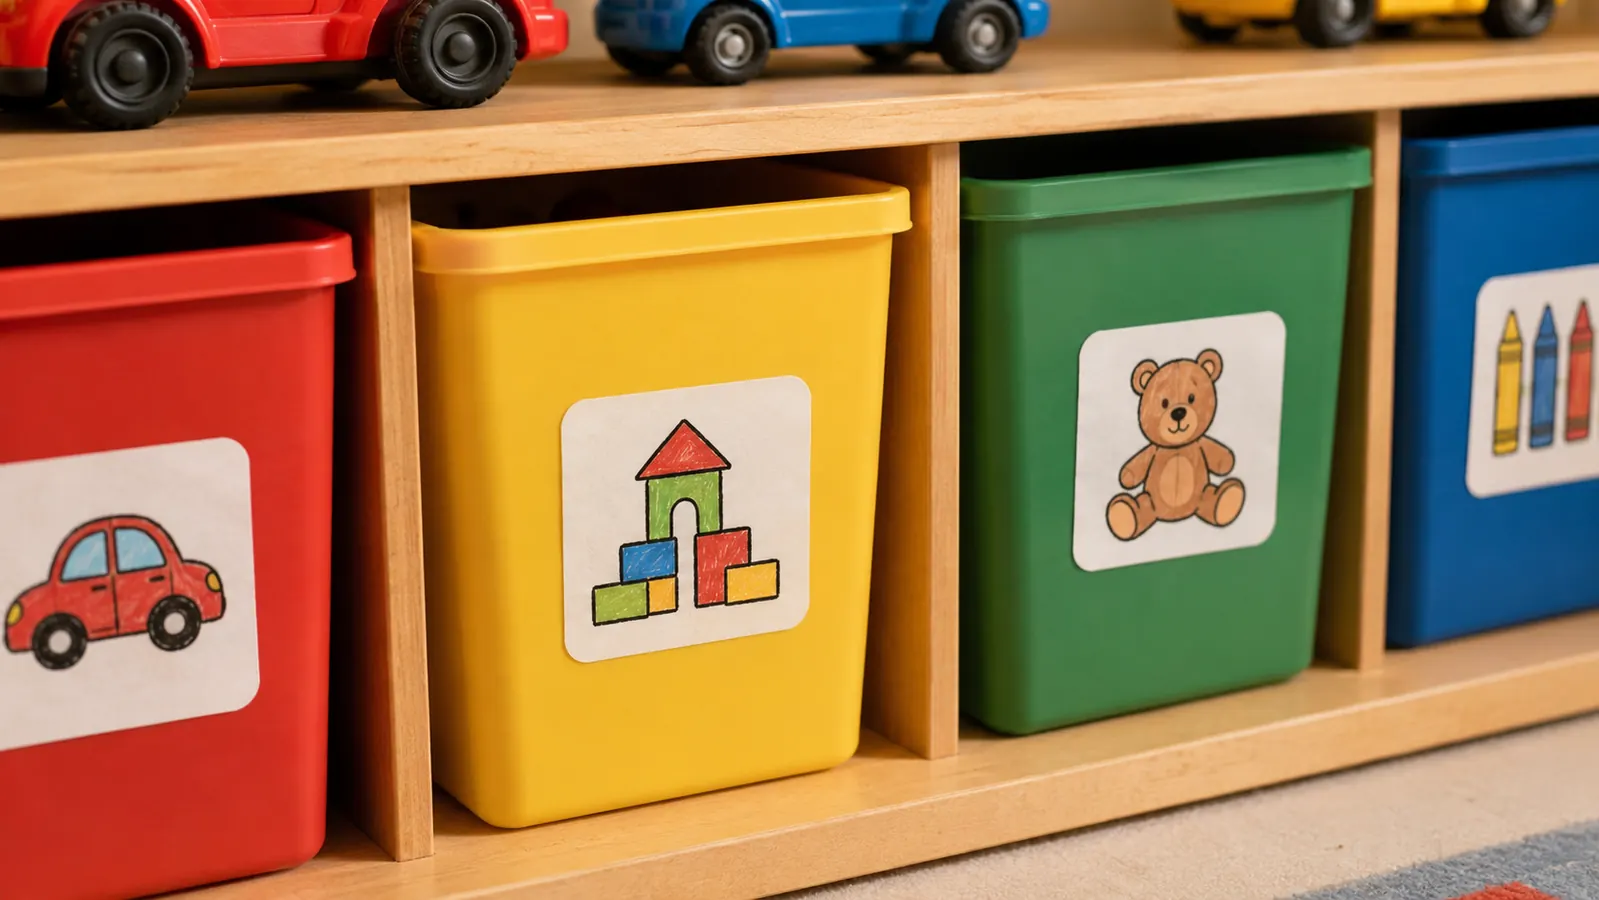
Step 3: Label Everything at the Child's Eye Level, Not Yours
This step is where most parents take a shortcut that breaks the system. They write category names in neat handwriting on a label maker and stick them to the front of the bins. The labels are at adult reading height, or they are words a pre-reader cannot decode, or both. A four-year-old does not know what 'transportation' means. A two-year-old cannot read 'art supplies.' What they can recognize instantly are pictures.
My preferred approach is simple picture labels printed on sticker paper, one image per bin, affixed to the front face of the bin at the very bottom so it is at the child's eye level when the bin is on the shelf. You do not need to design these. Search 'toy bin labels printable free' and you will find dozens of solid sets. I usually use a mix of clipart-style images and actual photos of the toys in that bin snapped on my phone. Print, laminate if you have a laminator, and stick them on. I have seen kids as young as twenty-two months navigate a fully labeled organizer independently within three days of setup. The picture is doing the cognitive work the reading would otherwise require.
One extra detail that matters: put the same image on both the bin and the shelf slot behind it. That way, even when a bin is pulled out and sitting on the floor during play, the child can see where it belongs by looking at the empty slot on the unit. It makes the bin feel like a puzzle piece that has one right place, which is enormously motivating for young kids.
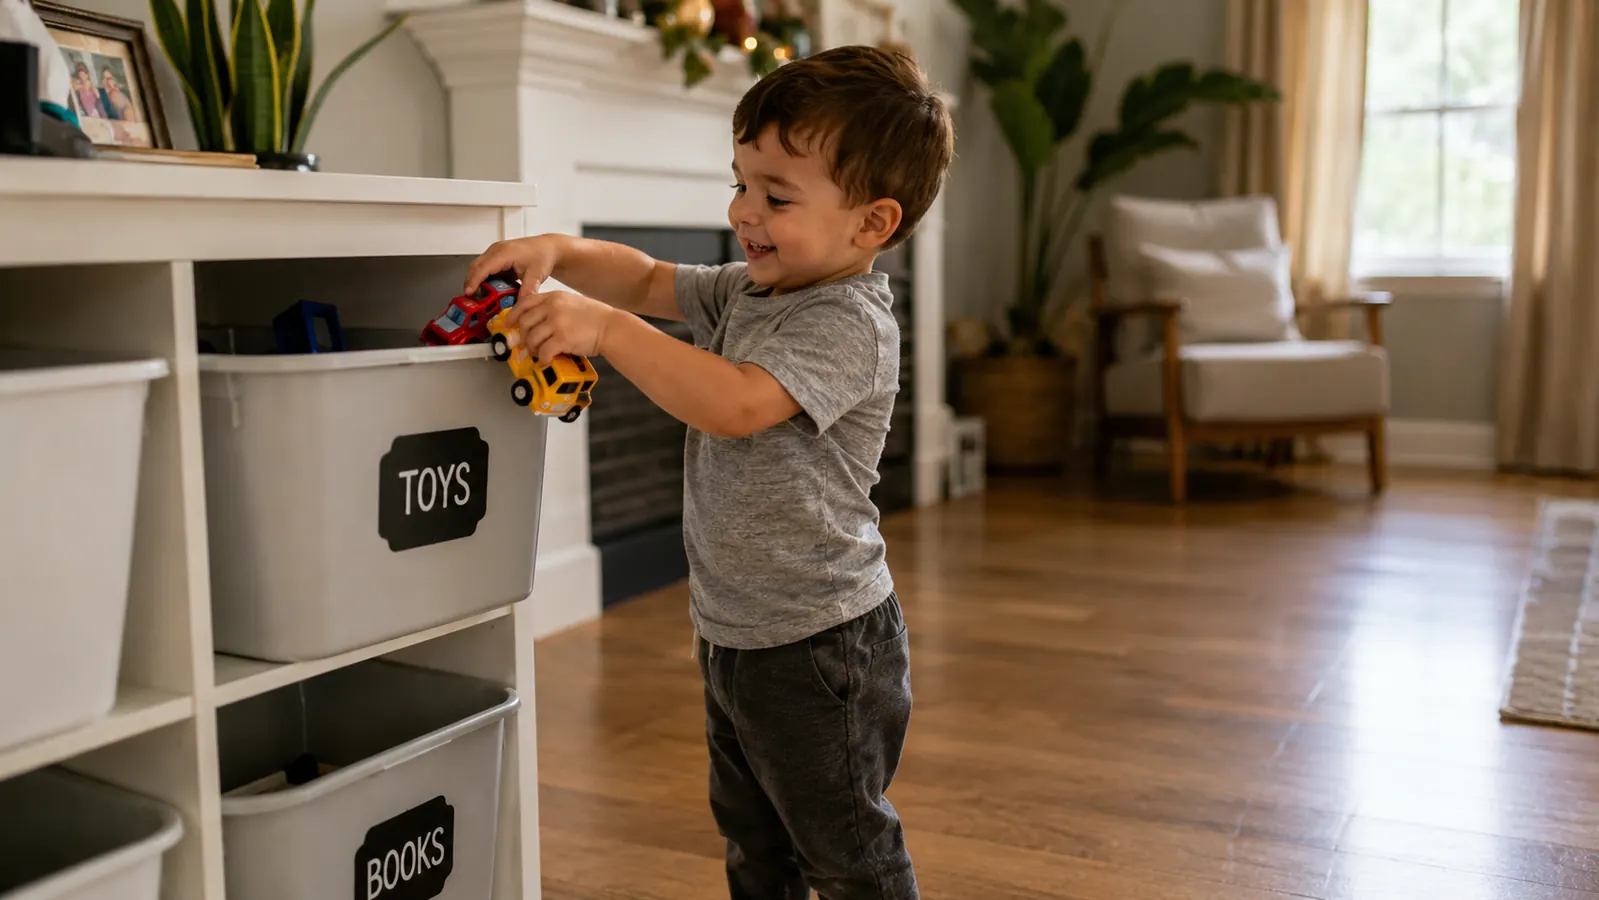
Step 4: Place the Unit Where Cleanup Actually Happens, Not Where It Looks Best
I have walked into more than a few homes where a perfectly good toy organizer is sitting in a corner of the playroom, out of the way, while the kids play in the living room every single day. Of course the toys do not get put away. The organizer is too far from the action. Children operate on proximity. A three-year-old will drop a toy within arm's reach of where they were playing. If the bin is twelve feet away in another room, the toy stays on the floor.
The unit needs to go where the play actually happens. In most homes I work in, that is the main living area or a shared family room, not a separate playroom the kids wander into occasionally. Yes, this means the organizer is visible from the couch. That is fine. A tidy toy organizer in a shared living space looks a hundred times better than the floor buried in toys, and parents are always surprised by how unobtrusive it is once the bins are filled and labeled. Position it against a wall with clear floor space in front so children can sit down and sort toys back in without bumping into furniture.
A three-year-old will not walk to another room to put something away. The organizer has to live where the playing happens, not where it looks tidy on a floor plan.
Step 5: Run a Two-Week Cleanup Practice Before Declaring the System Done
The setup is not the finish line. The first two weeks after installation are when you find out which categories are wrong, which bins are overstuffed, and which labels need to be replaced with clearer images. This is normal and expected. I tell every client: the first version of the system is a draft. You are going to live with it for two weeks and then make small adjustments.
During those two weeks, do one guided cleanup session each day where you participate alongside the child rather than standing over them and directing. Pick up a toy, ask out loud 'where does this go?', walk to the bin together, drop it in. Narrate the label. 'That is a car, and cars go in the car bin.' Do this for five to ten minutes, then let them take over. By day five or six, most children four and older are navigating the system without prompting. By day ten, the routine is usually self-sustaining, at least for the toys they use most.
If a category keeps getting mixed up, that is a signal the label is not clear enough or the bin is in the wrong spot on the unit. Swap the image, move the bin, and try again. The goal is a system where the child knows without asking. Once you hit that point, cleanup becomes a two-minute task instead of a twenty-minute battle. That shift is not dramatic. It is just the right toy storage infrastructure, set up correctly, used consistently for two weeks until it becomes muscle memory.
What Else Helps
A few things I have learned from dozens of toy storage setups over fifteen years. First, keep the toy inventory at a level the organizer can actually absorb. If you have more toys than bins, the overflow always ends up on the floor and the system slowly stops working. A bin organizer with 16 slots works best when you treat those 16 slots as the limit, not the minimum. Second, rotate toys that are not in current heavy rotation into a lidded bin in a closet. Pull them out seasonally. Kids often rediscover stored toys as if they are brand new, which extends the life of the collection and keeps the active organizer from getting overwhelmed. Third, let the child help pick which bins go where during the initial setup. When a child feels ownership over the placement, they are more invested in maintaining it. A five-year-old who decided the stuffed animals go in the pink bin on the second shelf has a personal reason to put them there. That small sense of authorship matters more than you would expect.
One more note for small spaces: the Humble Crew toy organizer footprint is compact enough to fit in a living room corner without dominating the room. If you are working with limited square footage, the 16-bin unit is actually a better choice than a large toy chest or a sprawling low bookshelf, both because it holds more in less floor space and because the individual bins give kids far more visual clarity about where things belong. A toy chest, in my experience, becomes a black hole within three weeks. Everything goes in, nothing comes back out organized.
For more on why this type of toy organizer outperforms baskets and toy chests in family rooms, see my full Humble Crew toy organizer review where I go deep on build quality, bin durability, and real-home longevity after more than a year of client installs. And if you are still deciding whether a bin-based toy storage system is worth it over simpler options, the 10 reasons a toy organizer saves your living room piece lays out the case in plain terms.
Ready to set this up? The Humble Crew 16-bin organizer is where Dana starts every playroom
Stable enough for rough daily use, low enough for toddlers to reach every bin independently, and available in multiple bin color combinations to match your room. Check current availability on Amazon.
Amazon Check Today's Price on Amazon →